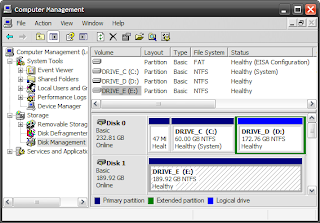
 For partitioning your external hard drive into new logical volumes, you require a back up of the current data on the drive. After the completion of partitioning, the data present in the drive will be lost totally. Given below are the steps to create partition on an external hard drive.
•Step 1: You have to log in from an Administrator account and then connect your external hard drive to your machine utilizing a USB cable or the right connecting interface.
•Step 2: If you are using Windows XP, Windows Vista or Windows 7, you need to right click on the My Computer icon.
•Step 3: Click Manage for opening the computer management console. Now click Disk Management from the list of options available in the left hand window.
•Step 4: You will get to know the existing storage device volumes and also find the external hard drive volume.
•Step 5: Right click and select the Delete Volume option. This deletes all stored data on the external hard drive.
•Step 6: Now the external hard drive will be marked Unallocated Space. Right click on this and select New Simple Volume.
•Step 7: Now you will be asked to specify the disk space amount; you have to specify the value in mega bytes or giga bytes.
•Step 8: For creating more volumes, you have to right click on the unallocated space and repeat the aforementioned step. This should be repeated till all the space is used up.
If you face problems, you may contact the computer repair Houston service for PC repair.


No comments:
Post a Comment