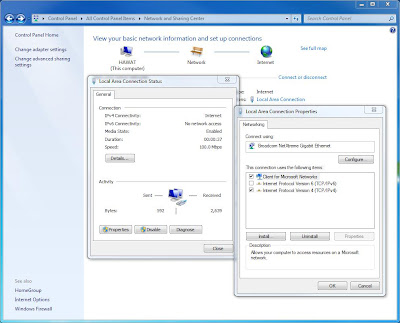
Local Area Connection or Local Area Network is the option which denotes the network adapter or the network card present in the computer. It appears, like all other connection types, in the
Network Connections folder. By default, a local area connection is always activated. A local area connection is the only type of connection that is automatically created and activated. If you disconnect your local area connection, the connection is no longer automatically activated. Because your hardware profile remembers this, it accommodates your location-based needs as a mobile user. For example, if you travel to a remote sales office and use a separate hardware profile for that location that does not enable your local area connection, you do not waste time waiting for your network adapter to time out. The adapter does not even try to connect. If your computer has more than one network adapter, a local area connection icon for each adapter is displayed in the Network Connections folder. If changes are made to your network, you can modify the settings of an existing local area connection to reflect those changes. In order to change the settings of local area connection, you need to:

• Click on “Start”
• Now go to “Control Panel”
• Click on “Network and Internet Connection”
• Click “Network Connection”
• Select the connection whose settings you want to change
• Under “Network Tasks”, click on “Change settings for this connection”
• Local area connection properties dialog box will open up
• From here do the necessary changes by selecting the desired option
• Click “Apply”
• Click on “OK” to save and exit


Thank for the useful mini tutorial that you post. This may be a short but important in you..
ReplyDeleteWeb Development
Skype Call Recorder allows you to record Skype calls to MP3 files.
ReplyDelete